Introduction to Mesa 2 Macros, Part II
Presented by Rollin White
Vice President, Sundial Systems Corporation
Overview
Having successfully mastered the basic elements of creating, writing,
and running a Mesa 2 macro, we're ready to explore some of their more
interesting uses. In this lesson we'll look at input from the user,
sending messages back, placing data on the spreadsheet, and
programmatically entering formulas.
The Console Window Is Your Friend
When REXX was designed, the assumption was that the user of a REXX
program would have a console (screen and keyboard) to interact with the
program. In today's OS/2 program which uses REXX for macros, it's not
always practical to turn the screen and keyboard over to a REXX program.
Mesa's solution to the problem is a Mesa specific script console. This is
a window separate from the spreadsheet that is used to display and
receive all of the standard input and output from your REXX macros.
Mesa's script console comes up automatically as needed. We saw it
demonstrated in the first lesson when we used the "say hello" command
which displayed the text "hello" to the console.
User Input
Any program which is user driven needs input from the user. For Mesa
macros, we'll get that input from both the spreadsheet itself as well as the
script console. Consider the following portion of a Mesa script to
collect information about a customer:
CLEARCONSOLE()
SAY 'Enter customer name:'
PULL CustomerName
 The CLEARCONSOLE command erases the contents of the console
window. We do this to clean up the screen by removing any past history. In practice, when a script is going to include input from a user, it's a good thing to start with a blank console window.
The CLEARCONSOLE command erases the contents of the console
window. We do this to clean up the screen by removing any past history. In practice, when a script is going to include input from a user, it's a good thing to start with a blank console window.
The second line of the script above is the familiar SAY command which displays the
text to the user. Finally, the REXX PULL command retrieves
keyboard input from the user until they have pressed the enter key. All
of the text typed in will be put into the variable named CustomerName.
There are more advanced forms of the PULL command, but here we'll stick to
the simple stuff.
As we'll see later on, the combination of SAY and PULL together can be used repeatedly in a script to gather as much information from the user as is needed.
Named Cells
In past examples we've referenced cells by their absolute location. For
example, [A]A1 refers to the first cell on the first layer. However,
it is useful to refer to cells with names, so that the layout of the
spreadsheet can be manipulated without affecting our macro.
Typically cell labels are used in formulas. For example without having to know the actual cell location of the Total, we can calculate the tax by using the cell label in the formula
"=Total*.0775". We're going to use a little trick to help us use these same labels for input:
call SEL 'CustomerName'
call PUTC CustomerName
The first line calls the Mesa MScript SEL to set the current selection.
In Mesa when you set the selection to a range of size 1, it is just like
moving the cursor to the named cell. The second line is a familiar
function, PUTC, but it is missing the second parameter location.
When the location is omitted, the value is put into the current cell
(which we just set with SEL).
Programming Formulas
If we had a macro to calculate the total on an invoice for each line, we
might want to set up the formula programmatically. That is, instead of
writing the individual formulas ourself, let's write a macro to do it
for us.
The logic is simple; Total = Quantity * Price. In the following
example, CurrentRow is the current row on the spreadsheet:
QtyCell = 'A'CurrentRow
PriceCell = 'F'CurrentRow
TotalCell = 'G'CurrentRow
PUTC('='QtyCell'*'PriceCell,TotalCell)
The first three rows are to make the code easier to read. They
establish the cell locations for Quantity, Price, and Total. For
example A3, F3, and G3. The fourth line uses the familiar PUTC function,
but instead of inserting a static number, a formula is created. Note
that we use the exact same syntax for the formula in this script as we would entering
it into Mesa manually. The result is that the cell G3 will have the
formula "=A3*F3" or Total=Quantity * Price.
Putting It to Work
The concepts we've just explored in this lesson are actually excerpted from a more complete Mesa 2 macro. Both the macro and the corresponding formatted spreadsheet are included in
InvoiceWizard.m2 as an example for you to work with.
You can see it all come together. Open the spreadsheet
and run the macro by clicking on the right triangle on the script tool bar.
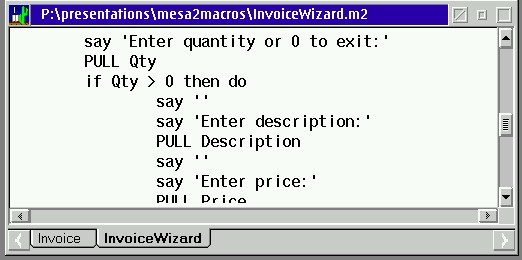 When you are finished with that, click on the script tab (it's the one named InvoiceWizard) to look at the complete macro in detail. You should find that you are already familiar with every concept used in the InvoiceWizard script!
Next Up
The next lesson will look at creating and using more complicated formulas. You won't want to miss it!